


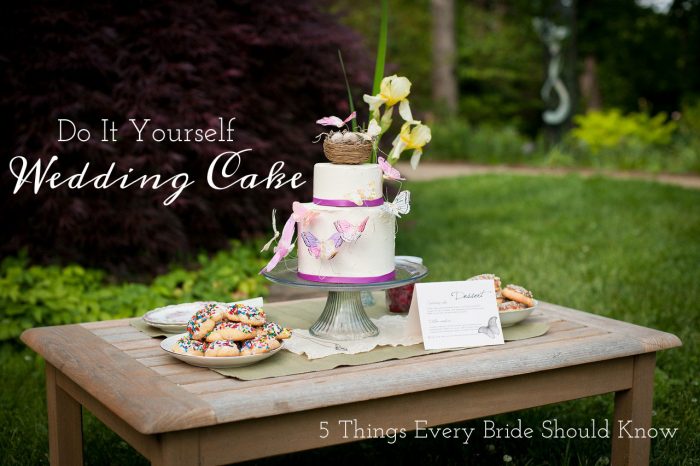
 Image by Two Ring Studios
When Hubs and I celebrate our anniversary, we have a new tradition. Instead of eating a year-old wedding cake topper, I made a small version of our wedding cake the first year. It has now become a tradition. Do you know what the best thing about baking your own wedding cake? Instead of eating some nasty, year-old, freezer-burned cake topper once, you get to eat a freshly baked wedding cake every year.
1. Practice, Practice, Practice
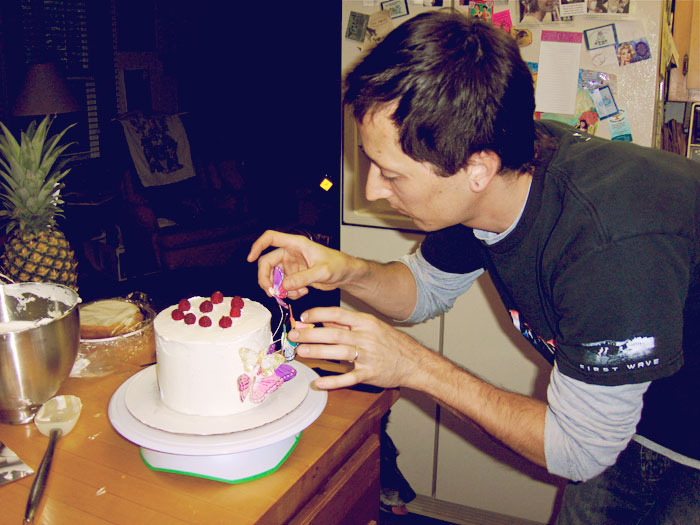 Image By Mountainside Bride
Even if you’re an avid baker and cook like myself, you need to start practicing early, not only to find your flavors, but also because wedding cakes are a different beast than your traditional layer cake. You’ll need to find a great wedding-cake specific recipe. Wedding cakes are denser than traditional layer cakes; they need to stand up to the abuse of being stacked and moved around. You’ll need to learn about how to pin a wedding cake together to prevent collapse and slippage. You also need to practice decorating. Unless you’re a professional cake decorator, you’ll need to take some time to figure out what you can and can’t reasonably do. You don’t want your cake to end up on cake wrecks!
2. You may or may not save money

Image By Mountainside Bride
I only had the basic 9-inch rounds and a Kitchen Aide mixer (a must) before I began this endeavor. I had to buy 6-inch rounds and 8-inch cake rounds (My mother sent me my grandmother’s 10-inch and 4-inch rounds.) I also had to purchase decorating tips and bags, cooling racks, color gels, meringue powder, a cake cutting wire, and a revolving cake decorating stand. I spend a couple of hundred on equipment alone. Every month, for seven months, made a 6-inch cake to try out flavors and decorating ideas. Sometimes I made two a month. BI was buying fresh berries, fine chocolates, liquors, and exotic fruits and nuts to experiment with different flavors adds up. I easily spent at least $400 on practice cakes. Then there was the ingredients for the actual wedding cake that would feed 100 guests. That came to $200. Lemons were expensive at the end of May, and butter and raspberries are always expensive. The total cost of my DIY cake was about $800 for 100 people. That’s $8 a slice for a plainly frosted 4-tier wedding cake! I could have easily paid $2-$3 for a similar professionally-made cake.
3. Figure out your strengths and weaknesses early on
And adjust your expectations accordingly!
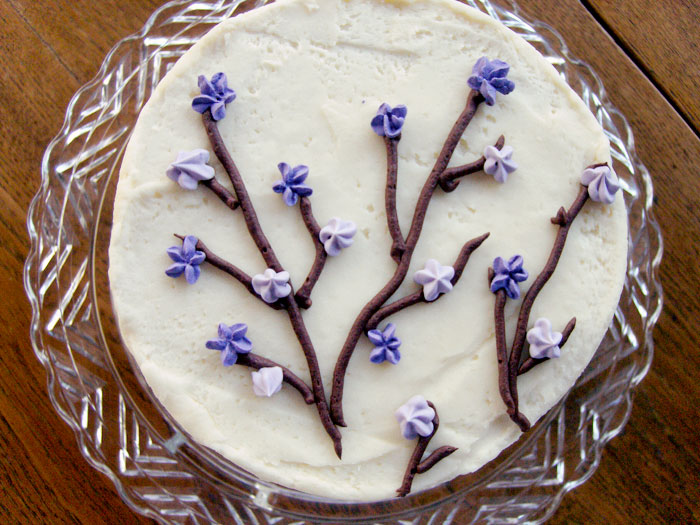
Image By Mountainside Bride
I had all of these grand ideas for our wedding cake: royal icing monograms, smooth fondant-topped cakes, and intricate swags and swirly-girly details. I started practicing early and I was smart enough to admit early that I totally suck as cake decorator, and I didn’t have time to learn (even at a Michael’s Cake Decorating class.) So I focused on what I was good at: baking tasty cakes. I also found out I was good enough, patient enough and meticulous enough to attend to the inner architecture of a wedding cake. So I decided to create a traditional tiered cake.

Because I possessed zero decorating skills, I decided to go with a Martha-inspired butterfly wedding cake. It seemed simple enough, but I couldn’t get perfectly smooth buttercream. After months of anguish, I finally focused on my strengths (tasty cake,) acknowledged the context in which my not-smooth buttercream would live (rustic-themed out door wedding,) and got over the imperfect buttercream enough to enjoy the process of baking the damn cakes! For some of you, you may want someone else to bake the cake and you decorate it. Or, you may want to do a dessert or mini cake table or opt for a collection of homemade cupcakes. The point is, figure out what’s possible and go with it!
4. Start Early
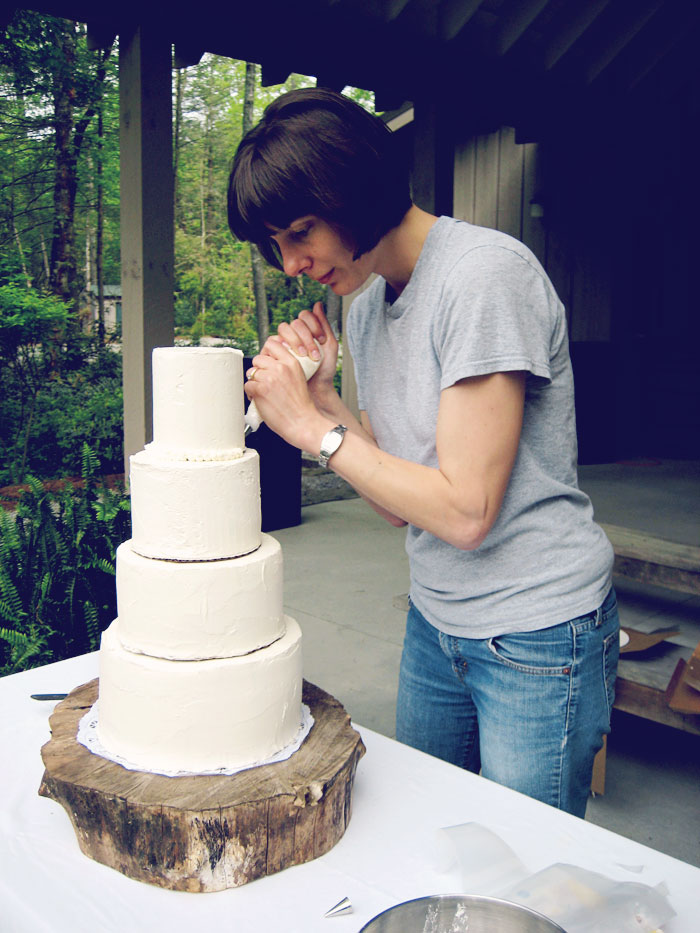
Image by Mountainside Bride
Four days before our wedding I made the lemon curd for the filling. Three days before, I baked all of the cakes. The day before I made the Swiss meringue buttercream and frosted the cakes. Now if you’re baking a four-tiered traditional wedding cake, like I did, you really need to create a solid timeline because you’re going to be working on that cake the entire week of the wedding, so carve out some time! Serving fresh, homemade cake was a priority of mine so I made the whole thing the week of. Here’s my timeline: Tuesday: Shop for ingredients and make the lemon curd. Wednesday: Bake the cakes. Thursday: Frost the cakes. Friday: Box and transport the cakes to the venue. (tip: lay damp kitchen towels on the floor or in the trunk to prevent the cakes from sliding around) Saturday: Assemble (and decorate) the cake on site the morning of the wedding. You can also freeze your cakes AND buttercream the month before. Wrap your cakes in wax or parchment paper, then triple or quadruple wrap in plastic Wrapping in parchment paper first will help mitigate that weird plastic wrap taste. Wrapping multiple times will help prevent nasty freezer burn. If you make your buttercream ahead of time (even by a few days) it may look weepy when it comes to room temperature and some of the egg whites separate. No worries! Just beat it on low with a flat paddle for a couple of minutes once it’s come to room temp.
5. Have others fill in the gaps
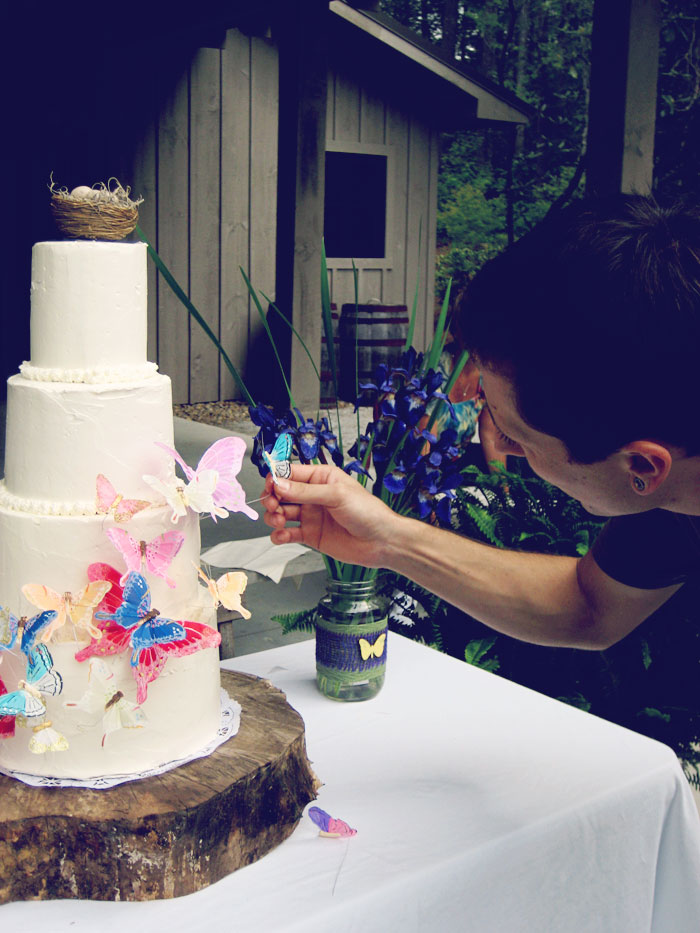
Image by Mountainside Bride
Have I mentioned that I suck at decorating? So I came up with a simple solution: just stick feather butterflies in the cake a-la Martha. Well, that not as easy as it looks either. You really have to have an eye for these things–an artist’s eye. Luckily, the Mountainside Groom is an artist and was willing to take over decorating duties the morning of the wedding. Hint: he practiced too!

Image by Mountainside Bride
Are you planning to DIY your own wedding cake? Leave a comment about why (or why not) and what your biggest wedding cake challenge is.